Guide · 5 min read
How to Create a Fillable PDF Without Uploading
Add text fields, checkboxes and dropdowns to an existing PDF locally. Position fields, review the result, and test the saved form before sharing.
Start with an existing PDF containing the labels and layout you need.
Verification basis
Checked on October 26, 2026: the generated Customer text field accepted a value that persisted after saving and reopening. Test your own form in the recipient’s reader.
Read the DayFiles workflow testing method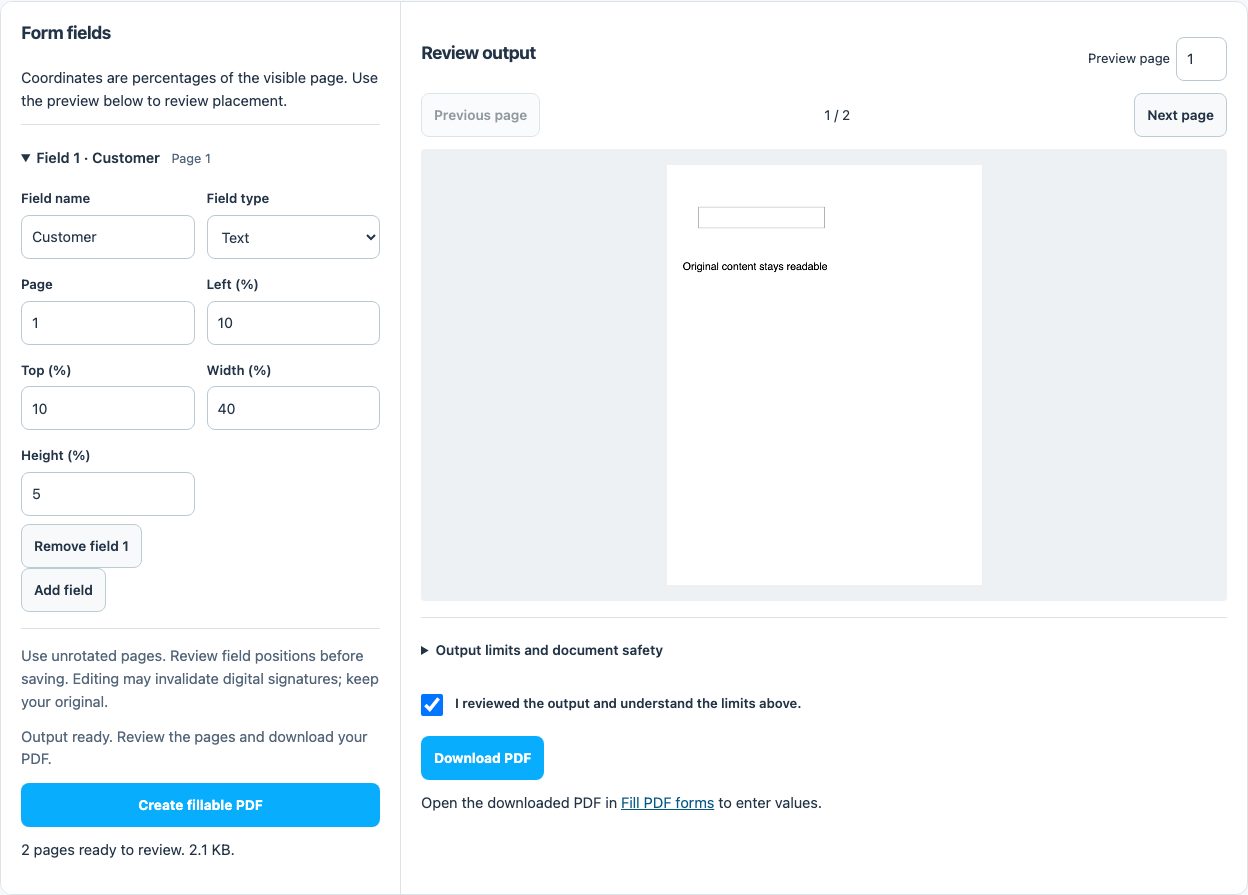
Direct answer
Use Create PDF forms to add interactive text fields, checkboxes or dropdown lists to an existing PDF. Choose the page, name each field, and set its position and size. Export, then enter a sample value in a PDF form reader to confirm the field works.
Creating fields is different from filling a form
A blank line printed on a PDF is not automatically an interactive field. This tool adds fields over the existing page; it does not infer them from labels or scanned handwriting. Prepare the page text and layout first, then add the controls a recipient should complete.
If your PDF already contains usable fields, go directly to Fill PDF forms. Existing fields are preserved when you add new ones, so choose names that do not collide with them.
Add your first text field
Use an unrotated PDF of at most 50 MB and 200 pages. Field creation supports up to 50 new fields in a run.
- Open Create PDF forms and choose your PDF.
- Set the field type to text and enter a unique name such as Customer. Choose the page where the answer belongs.
- Set Left, Top, Width and Height as percentages of the visible page. Start with a small field in a clear area, then adjust after previewing.
- Add more fields if needed. Use a checkbox for a yes/no choice or a dropdown for a fixed list.
- Select Create fillable PDF, review the output pages, confirm the review and download the file.
- Open the download in Fill PDF forms or your recipient’s PDF reader. Enter a sample answer, save and reopen it to check persistence.
Position fields using page percentages
Left and Top are measured from the upper-left corner of the visible page. On a 600-by-800-point page, Left 10% starts 60 points from the left and Top 20% starts 160 points below the top. Width 40% spans 240 points; Height 5% spans 40 points. Percentages help across page sizes but do not locate printed labels for you.
| Control | Use it for | Check before export |
|---|---|---|
| Text field | Names, references and short answers | Leave enough height for the expected entry |
| Checkbox | A single independent choice | Put the box beside an explicit label |
| Dropdown | One choice from a fixed list | Enter one distinct option per line |
Name fields so the answers stay separate
Use unique plain-English names of at most 60 characters, without dots. CustomerName and OrderReference are easier to identify later than Field1 and Field2. Dropdown lists accept 1–30 distinct options of up to 80 characters each; keep their wording short enough to read in the chosen width.
Avoid placing two controls on top of one another. Preview every page that receives a field, particularly when the document mixes page sizes. Rotated pages are not supported by this creator; prepare an unrotated copy first.
Troubleshoot the exported form
If a field covers a label, reduce its width or move its Top/Left position and export again. If an answer does not save, try a reader that supports interactive PDF forms and verify by reopening the saved copy. Viewing a preview is not the same as testing data entry.
Automatic field detection, calculations and signature certification are not included. A checkbox labelled consent is only a form control; this tool does not establish who selected it.
Work on a copy. Rewriting a PDF can invalidate existing digital signatures; these tools do not certify signatures or restore their validity.